Worm composting is a phenomenon that only grows in popularity among gardeners over time, and it has been a while since we provided a comprehensive guide to this useful tool. This article will provide an updated, crash course guide to worm composting.
Also known as ‘vermicomposting’ or ‘vermiculture’, the basic science behind worm composting is putting a bunch of composting worms (worms that feed on and recycle organic material) in a large container in which you dump any unwanted food scraps or other organic material for them to break down into a usable fertilizer. However, there are methods that need to be set in place in order to do this properly and achieve the desired results.
Before we get into the bulk of the article, it is worth mentioning that we have covered this topic previously, and our readers are more than welcome to check out some of our older articles on the subject, such as ‘Composting with Worms’ or ‘The Key to Breeding White Worms (Pot Worms)’. This article will attempt to provide a more up-to-date basic guide to vermicomposting.
Firstly, in terms of what you need, there are various components to worm composting. You will need:
Two plastic containers of various sizes. One tall one with a lid, and one shallow one, as the tall container will go inside the shallow one. Either plastic or rubber are the ideal materials for such containers. The larger of the two should be somewhere around 20x15x15-inches and be able to hold 18 gallons, while the shallow container simply needs to be wide and long enough to hold the large container without being too tall. The former of the two containers should also be flexible enough to withstand drilling, as you will need to make holes in the container for the liquids to be able to drain into the shallower container. Making two at the top on opposite sides, and four at the bottom should suffice in performing this function.
Mesh (nylon or fabric, not metal) to cover said holes.
Soaked, shredded paper to put at the bottom of the tall container (the United States Environmental Protection Agency suggests having “enough to fill your bin three-inches deep).
One pound of moist, chemical-free soil.
A trowel.
Food scraps (naturally).
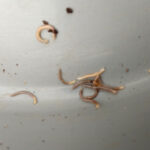
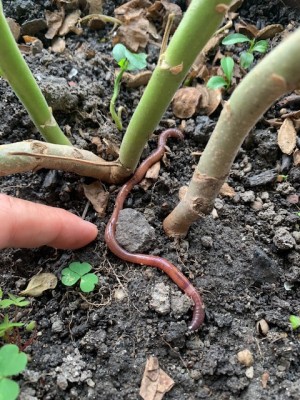
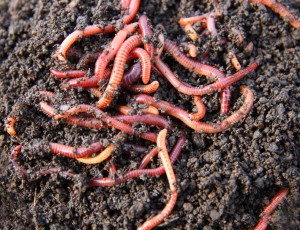
Worms! (redworms, earthworms, or white worms are the most commonly purchased worms for vermicomposting)
Secondly, you will need to know how to properly prepare your container for vermicomposting.
Drill holes in your tall container and cover them with mesh.
Place the tall container inside the shallow one.
Mix your soaked shredded paper with your moist soil and put it in the bottom of the tall container.
Add the worms to the container and leave them for one day to get used to the environment.
After the one day is up, start adding your food scraps to feed them.
Thirdly, it is important to understand what your worms can eat and will compost, and what they cannot eat. Some examples of what they can eat include fruits, vegetables, coffee beans, and grains. Composting worms can even eat wood and paper if cut up into small enough pieces! However, food items they cannot eat are meat, bones, dairy or any animal by-products.
Furthermore, there is also a specific way you should feed your worms. Before putting in new food scraps in your container, you are going to want to create a small hole for them using the trowel. In that hole, you then first put more shredded paper before adding your food straps. Then, on top of that, add more shredded paper and soil. This will prevent the attraction of fruit flies. Lastly, put the lid back on your worm bin.
Additionally, try to keep track of what the worms do not eat, as there may be reasons for it. Either they simply do not like it and you can stop adding it to your worm bin, or you can try cutting it up into smaller pieces if that is the problem. It is also important to take into account which types of worms you are dealing with and what they like to eat. For example, white worms prefer starchy and acidic foods, so if you get white worms, make sure that they get a combination of both in order to actually attract them to the surface to eat. One thing that seems to work for a lot of white worm breeders is bread soaked in milk, as this makes for the perfect starchy-acidic combination.
Last of all, in order to maintain the bin, you will want to remove the liquid from the bottom container once every few months. But don’t just throw it away! This liquid also acts as an excellent fertilizer! It can either be poured directly onto your soil in the garden, or it can be watered down for houseplants. Once the actual container with the worm compost is starting to get full, you are going to want to start using that new, nutrient-rich fertilizer. So, how do you get the soil out without also taking away the worms? One simple method is starting to put food scraps on only one half of the container for a couple of weeks so as to attract the worms to that half of it, and then voila, you can take out half of the compost in the container!
To conclude, this has been a basic and short crash course on worm composting. Our aim with this article was just to provide some insight for people thinking about starting a worm-composting bin and to show them that it really is not that difficult. There are some minor details and specifics (in terms of measurements and such) that we did not get into for the sake of keeping the article on the shorter side, so if any of our readers want more information, we recommend checking the EPA (previously linked) as they provide an excellent and comprehensive guide to vermicomposting. Best of luck to any aspiring worm composters!
All About Worms is always free, always reader-supported. Your tips via CashApp, Venmo, or Paypal are appreciated! Receipts will come from ISIPP Publishing.
CashApp us

Venmo us

Paypal us

You might also find these guys interesting!
 White and Brown Worm-like Organisms with Antennae in Compost Bin are Millipedes
- Slimy Dark Green Worm in Toilet is a Flatworm
- Spade-shaped Worm with Antennae-looking Appendages is a Mystery
- Striped Brown Worm is a Tiger Worm
- The Various Species of Earthworms and Their Differences – Part 3: The Giants
- The Various Species of Earthworms and Their Differences – Part 2: Pheretima and Jumping Worms
- Red-striped Worm in Loo is a Bloodworm
- Bundle of Clear Worms on Website are Newly-hatched Caterpillars